
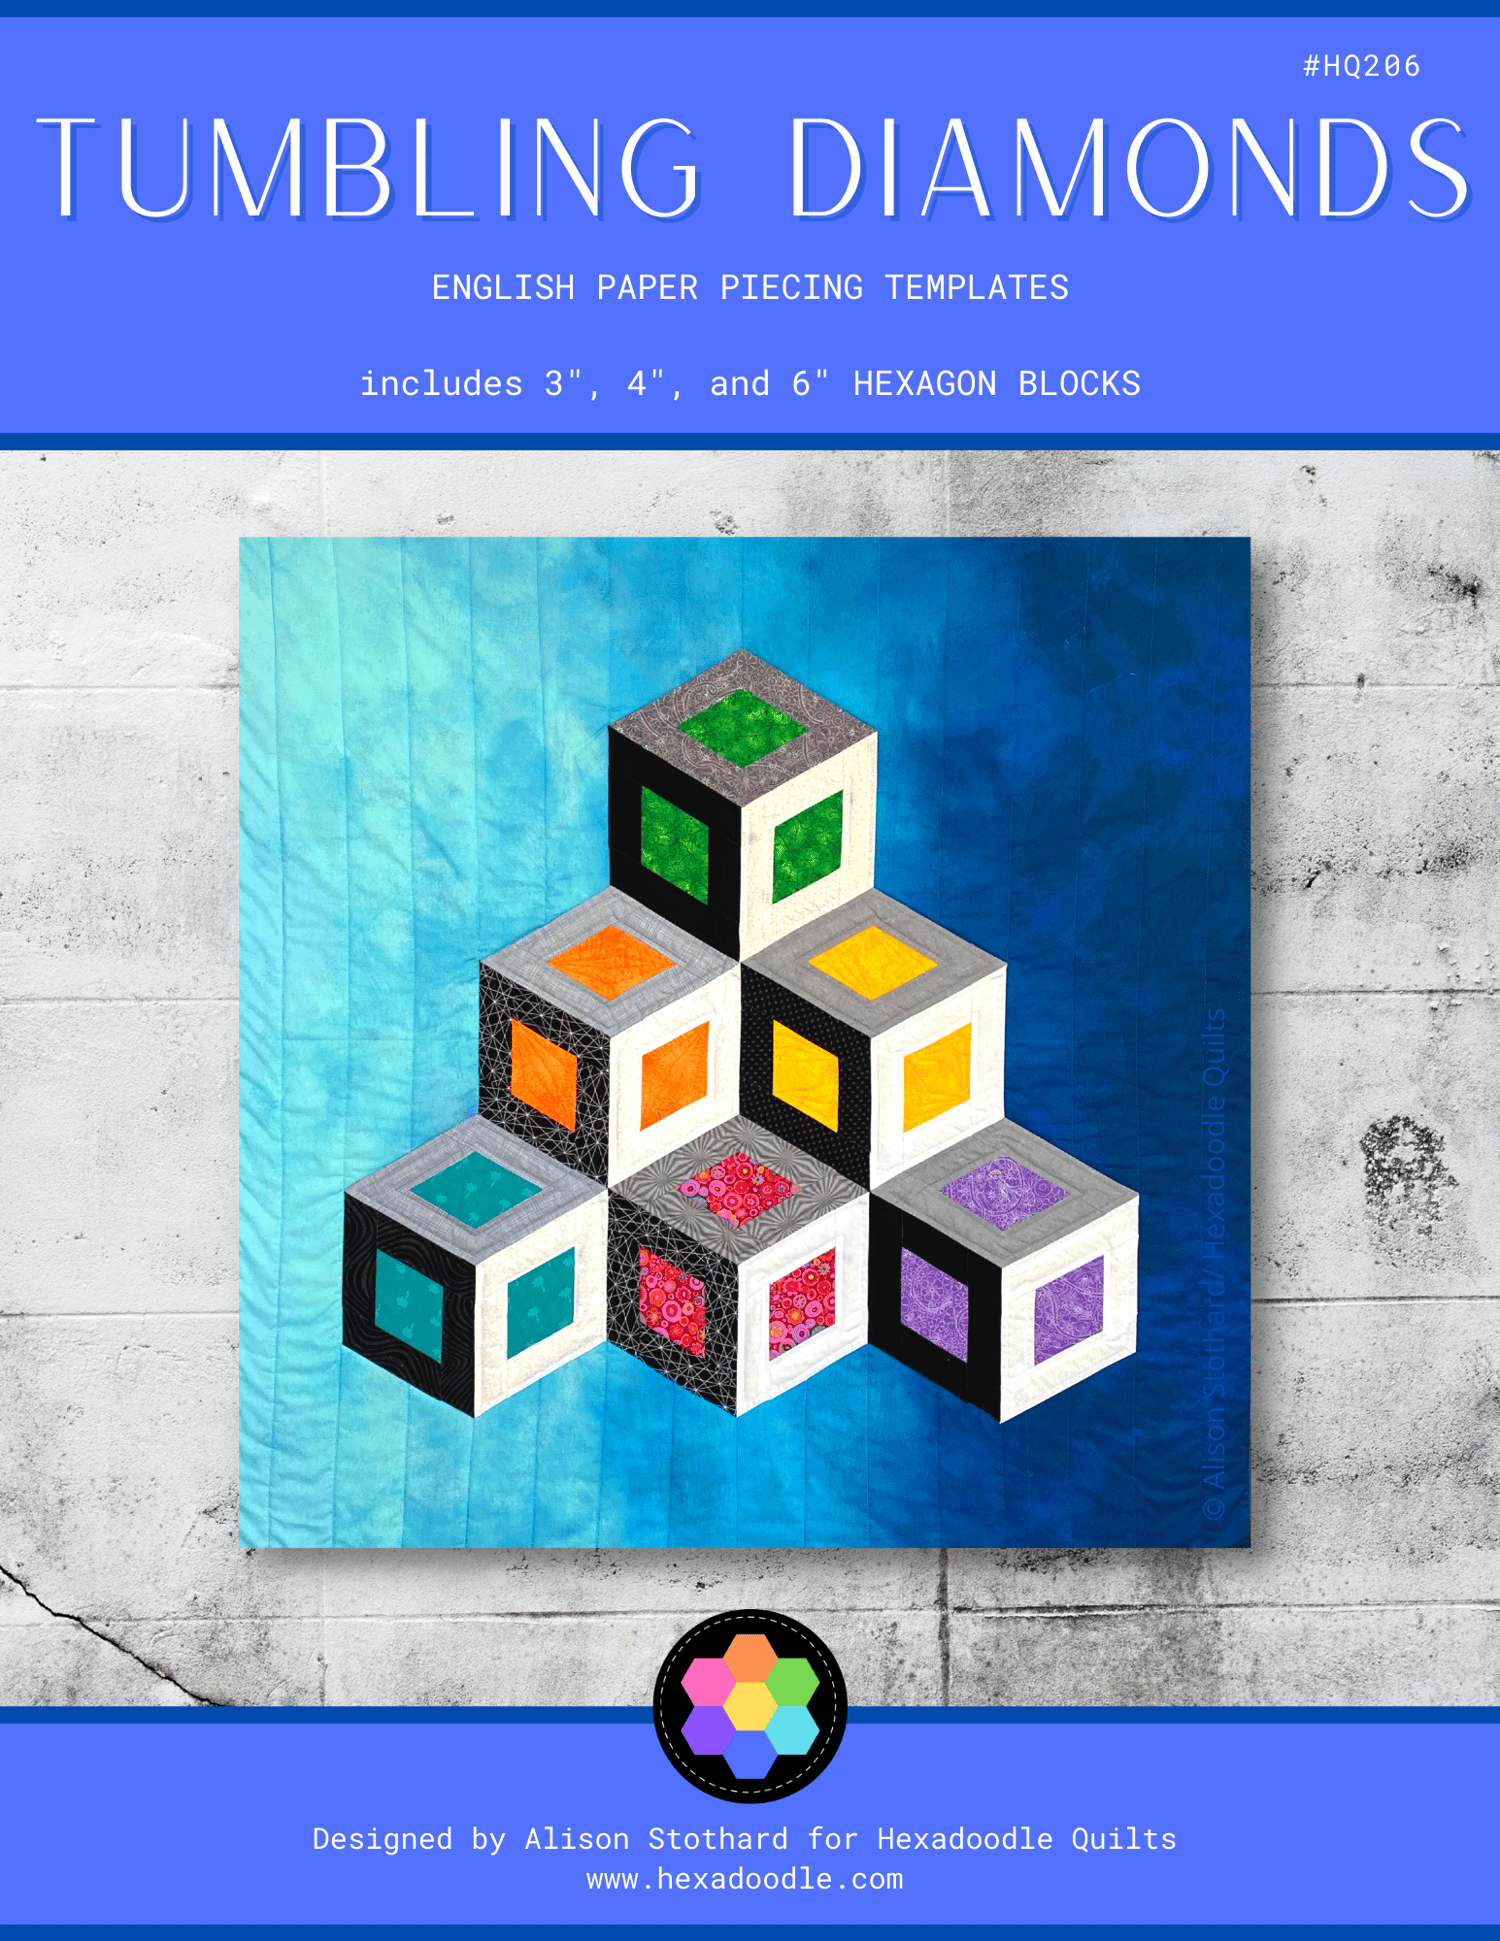
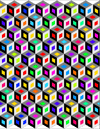
Take your English paper piecing to the next level with this variation on the much loved Tumbling Blocks design!
In this tutorial, I'll take you through step by step on how to stitch a midi sized Tumbling Diamonds block which makes a 4" finished hexagon. i.e. each side of the hexagon measures 4 inches.
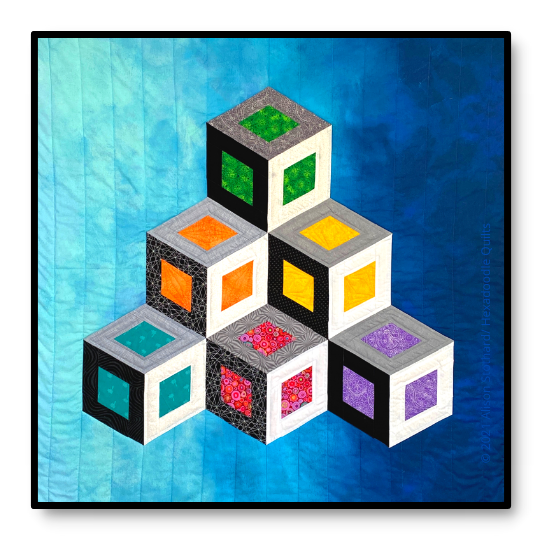
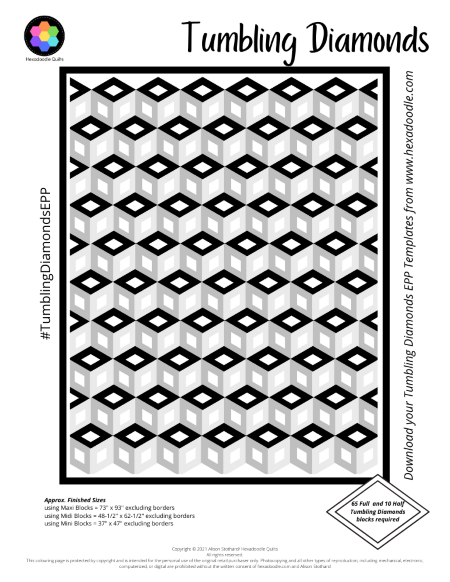
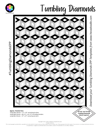
Tumbling Diamonds Wall-hanging from nine (9) Maxi blocks. Finished size 40" x 40"
© 2021 Designed and Made by Alison Stothard for Hexadoodle Quilts
***
Here's what you'll need to make a single Midi Tumbling Diamonds block (7" h x 8" w):
- Tumbling Diamonds MIDI sized EPP Templates
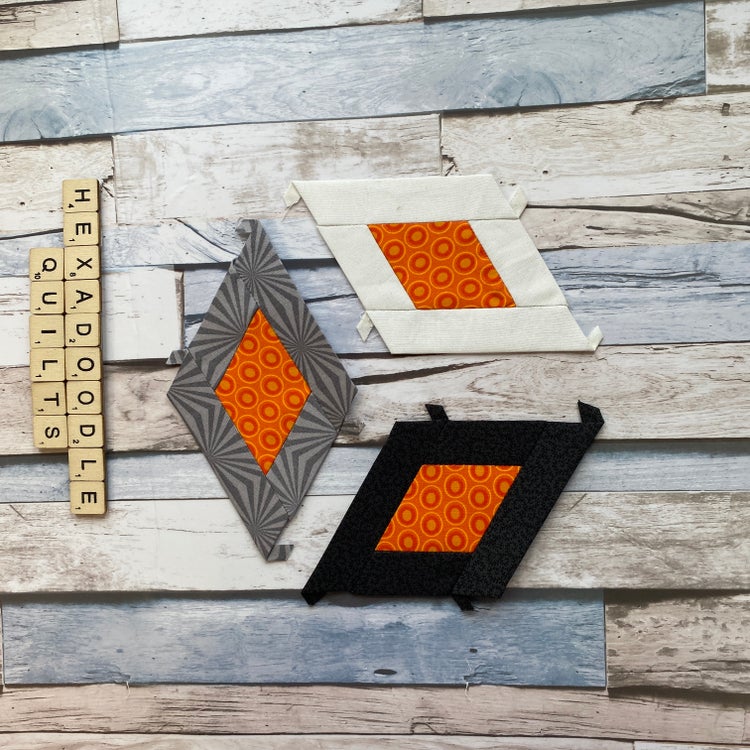
- Assorted fabric strips in Dark, Medium and Light tones for the Frame pieces. (I used some left over 1 ½" log cabin strips in a variety of Black, Grey and White shades)
- Colourful fabric scraps for your Diamonds. (Left over jelly roll strips are perfect for the midi sized block)
- Your usual EPP sewing kit including scissors, needles, glue stick and matching threads for your fabrics. I used black, white and grey threads to match my frame fabrics.

Prepare the paper templates
- Download the Tumbling Diamonds Block templates
- Open the PDF template files in Adobe Reader (very important - don't print straight from the browser)
- Print the chosen template size at 100% with NO SCALING onto lightweight card stock
- Cut out the templates carefully using either paper scissors or a rotary cutter that is used for paper only. Whether you choose to cut on the line, inside the line or outside the line is entirely up to you. Just be consistent throughout your project!
- Optional: Punch a hole in the centre of the templates to make removing them easier

(Top Tip: Keep hold of your old rotary cutting blades when they become too dull for cutting fabrics and use them for cutting paper/card instead)
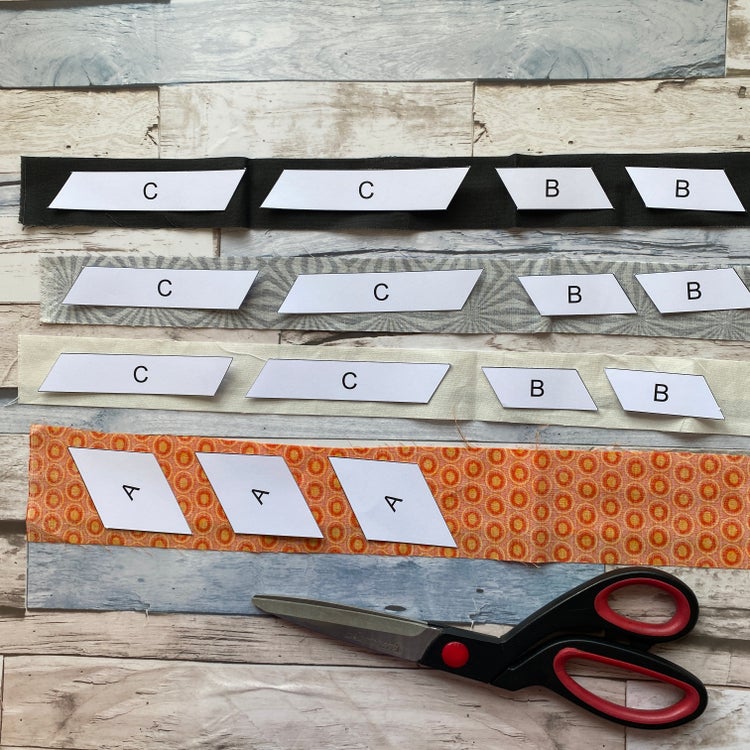
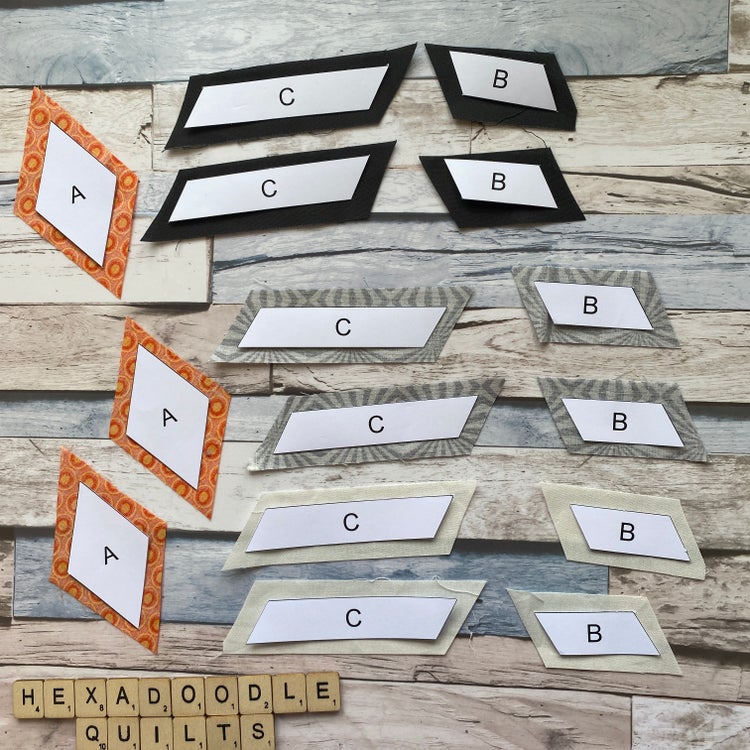
Cut Fabrics
Lay your paper templates onto the WRONG SIDE of your fabrics with the printed side of the template facing up and cut out leaving at least 1/4" seam allowance around all sides.
For larger blocks I find that a ⅜" seam is easier to work with.
Basting Suggestion
Baste the fabrics over the templates using your preferred method (I'm all about the glue baste for these long skinny pieces).
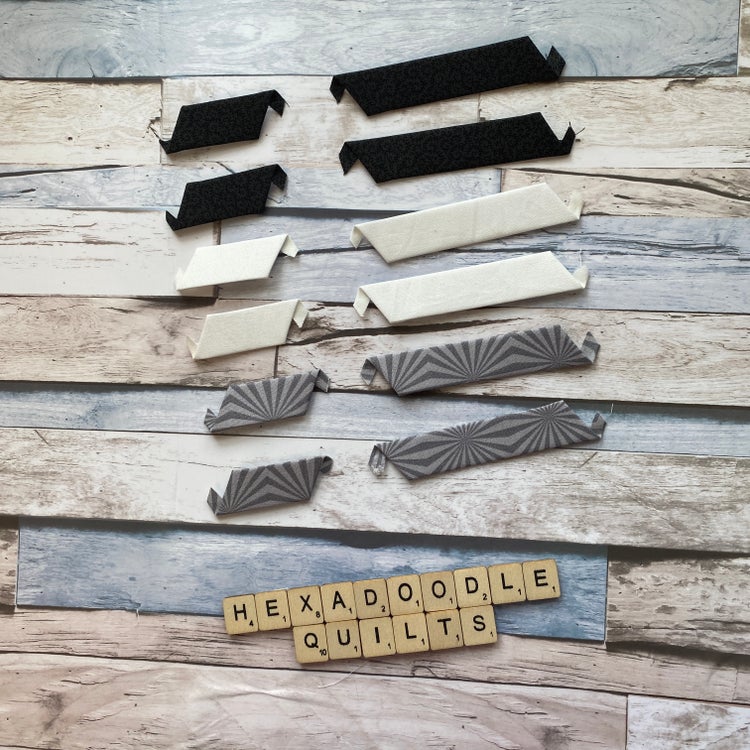
Frame Pieces
Start with the shortest edges first and then the longest edges. This will ensure that your "tails" all nest together when joining multiple tumbling diamond blocks.
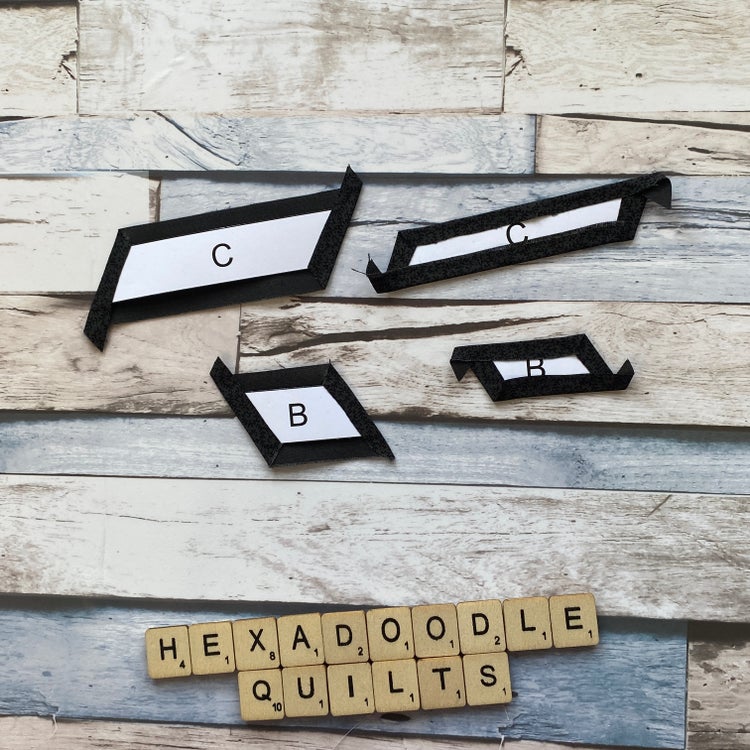
Diamonds
The nature of this block means that there are no special basting instructions for the diamond templates. Baste in your preferred order - leaving "tails" free.
I like to baste opposite sides of the diamond as shown below:

Piecing Order
Sew the two (2) short frame pieces (B) to either side of the centre Diamond (A) as shown:


Sew the two (2) Long frame pieces (C) to the opposite sides:
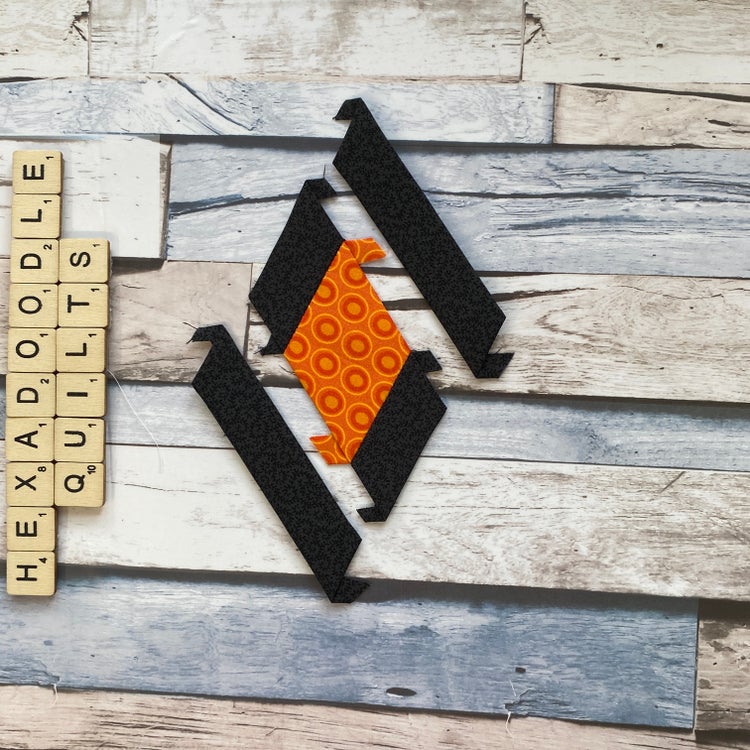
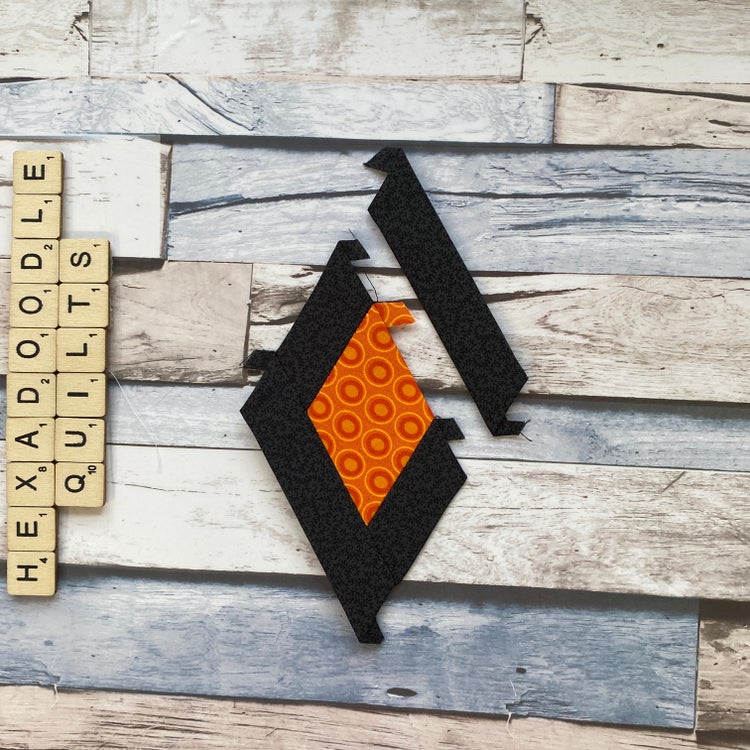
Repeat for the remaining diamonds:
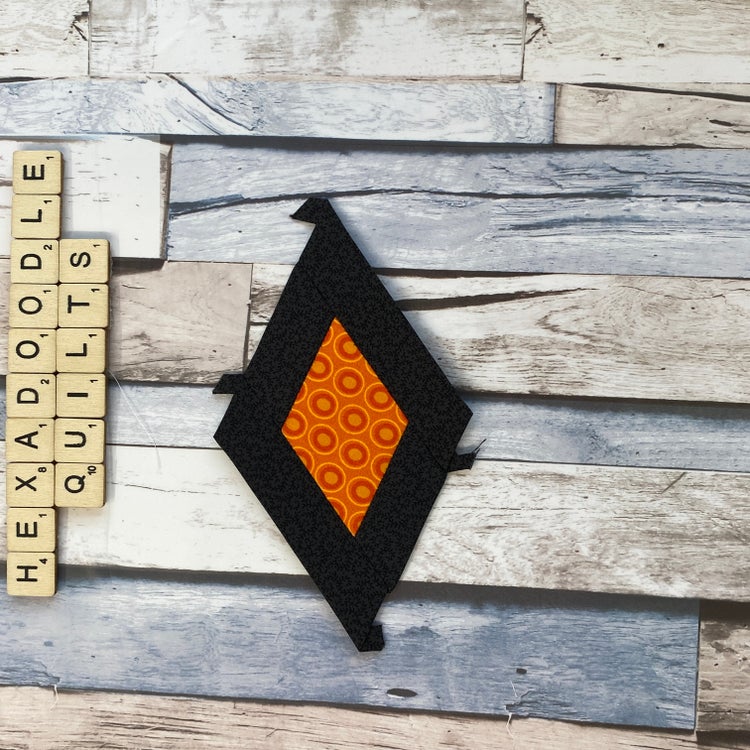
Lay out your Tumbling Diamond blocks as shown above and then stitch together to make a complete block..

Ta Da!! One tumbling diamonds block
***
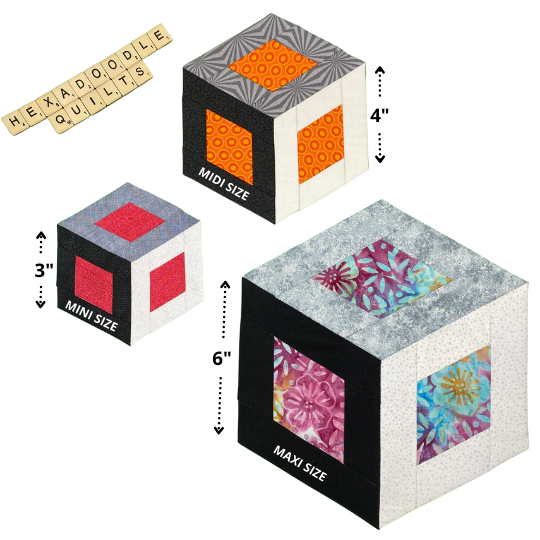
Tumbling Diamonds Finished Block Sizes
The templates in the Tumbling Diamonds Block Pack are provided in 3 sizes enabling you to create a variety of different sized 3D illusion projects:
Mini Templates : 3" Hexagons
Midi Templates : 4" Hexagons
Maxi Templates : 6" Hexagons

You can download your Tumbling Diamonds block templates from the EPP Block Library
Got any questions?
Please don't hesitate to get in touch!
Happy Stitching!
Alison xx
***
If you enjoyed this tutorial or have any questions, please let me know in the comments and don't forget to share it with your friends on Facebook, Pinterest and Twitter!
Don't forget to tag me with your finished makes
@hexadoodlequilts #hexadoodlequilts #tumblingdiamondsepp


Comments ()